

A flat tire can happen when you least expect it. You might be driving to work, heading out on a road trip, or simply running errands when you suddenly notice your car pulling to one side or hear an unusual flapping sound. Knowing how to change a tire can save you time, reduce stress, and help you get back on the road when it’s safe to do so.
You don’t need to be an experienced mechanic to replace a flat tire with a spare. With the right tools, a suitable location, and a little preparation, most drivers can learn the basic process. However, safety should always come first. A tire should never be changed beside moving traffic or on unstable ground. This guide explains what you need, how to change a tire step by step, and what to do after installing the spare.
What You Need to Change a Tire
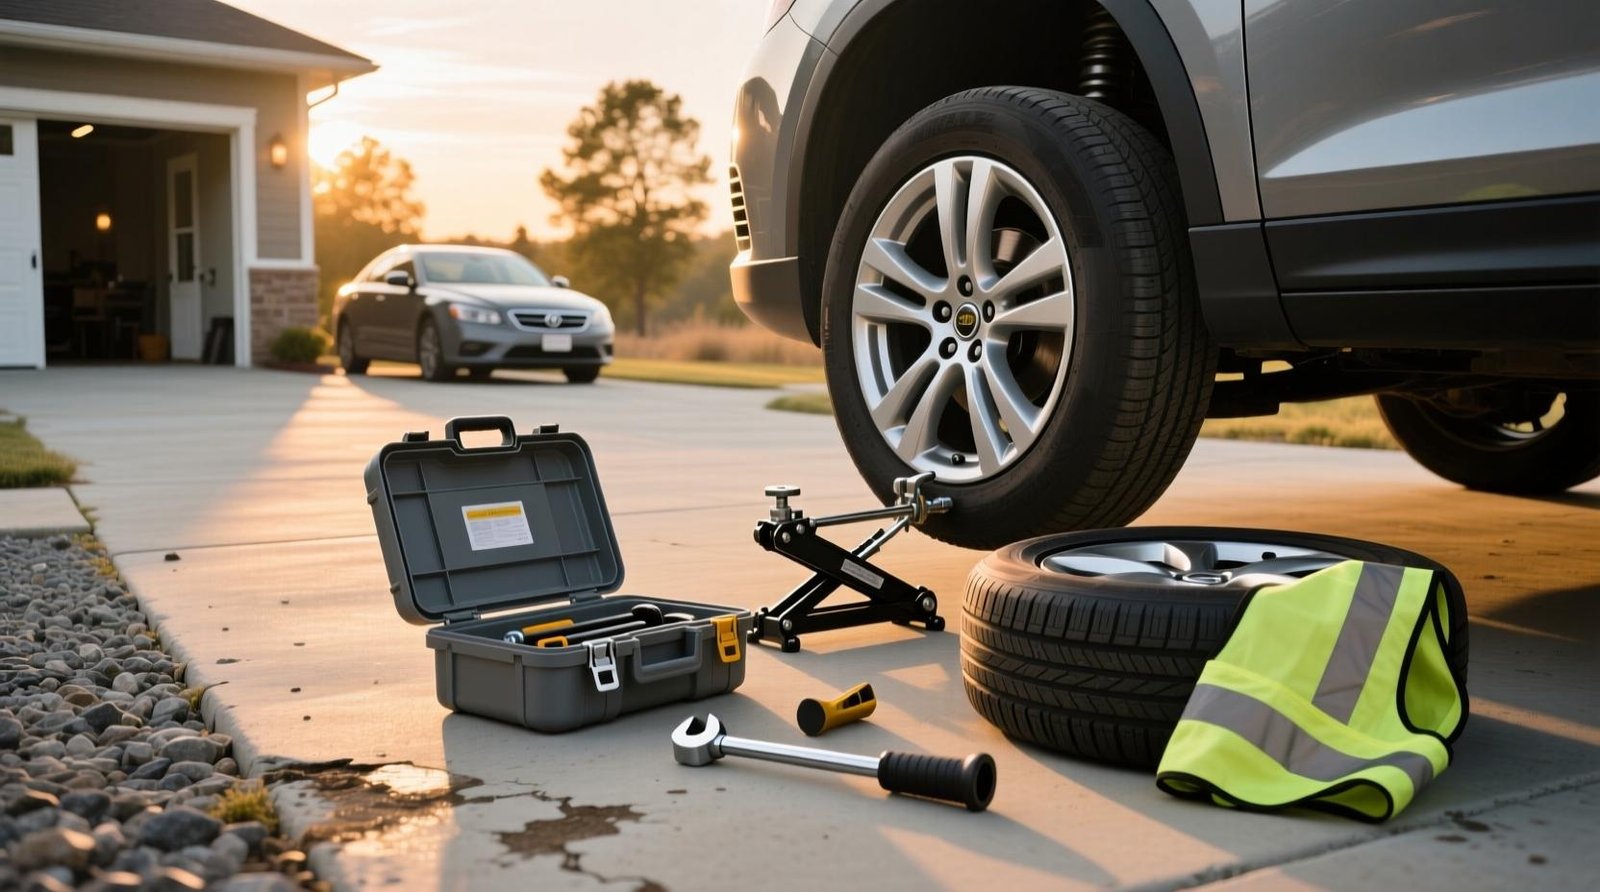
Before getting started, check whether your vehicle has a spare tire and the tools required to install it. Many cars include these items in the trunk or beneath the cargo floor, although some newer models come with a tire repair kit instead.
Here are the essential tools you may need:
- Spare tire: A properly inflated spare that fits your vehicle.
- Car jack: A jack rated for your vehicle’s weight and designed for the correct lifting points.
- Lug wrench: A tool for loosening and tightening the wheel nuts.
- Wheel wedges: Blocks that help prevent the vehicle from rolling.
- Gloves: Useful for keeping your hands clean and improving grip.
- Reflective warning equipment: Such as a warning triangle, where appropriate and legal.
A flashlight can also be helpful if you experience a flat tire at night. Keep your tools together so you can find them quickly in an emergency.
Before a long journey, inspect your spare tire’s condition and pressure. A spare that has been sitting unused for years may not be ready for the road.
Step 1: Find a Safe Place to Stop
The first step is not removing the wheel. It is finding a safe place to stop.
If you notice a flat tire while driving, slow down gradually, avoid sudden braking, and steer toward a safe, level location away from moving traffic. A parking lot, wide shoulder well away from traffic, or another designated safe area may be suitable depending on the circumstances.
Once stopped, switch on your hazard lights and apply the parking brake. Put an automatic transmission in Park. For a manual transmission, select first gear or reverse, following your vehicle manufacturer’s instructions.
If you are on a narrow highway shoulder, near a blind curve, on soft ground, or somewhere vehicles pass close by, do not attempt to change the tire there. Move to a safe location only if the vehicle can be driven without creating additional danger. If it cannot, stay out of traffic and contact roadside assistance or emergency services as appropriate.
Never crawl under a vehicle supported only by a jack.
Step 2: Secure the Vehicle and Prepare the Spare
After parking safely, switch off the engine and make sure passengers are in a safe place away from traffic.
Place wheel wedges or suitable blocks against a wheel that will remain on the ground. On level ground, this helps reduce the risk of the vehicle rolling. Follow your vehicle’s manual for the correct arrangement.
Take out the spare tire, jack, and lug wrench. Check the spare for visible damage and confirm that it appears properly inflated. If you have a temporary spare, remember that it is intended for limited use rather than permanent replacement.
Locate the correct jacking points in your owner’s manual. These are reinforced areas of the vehicle’s frame or body designed to support its weight during lifting. Using the wrong point can damage the vehicle or cause it to slip off the jack.
Step 3: Loosen the Lug Nuts
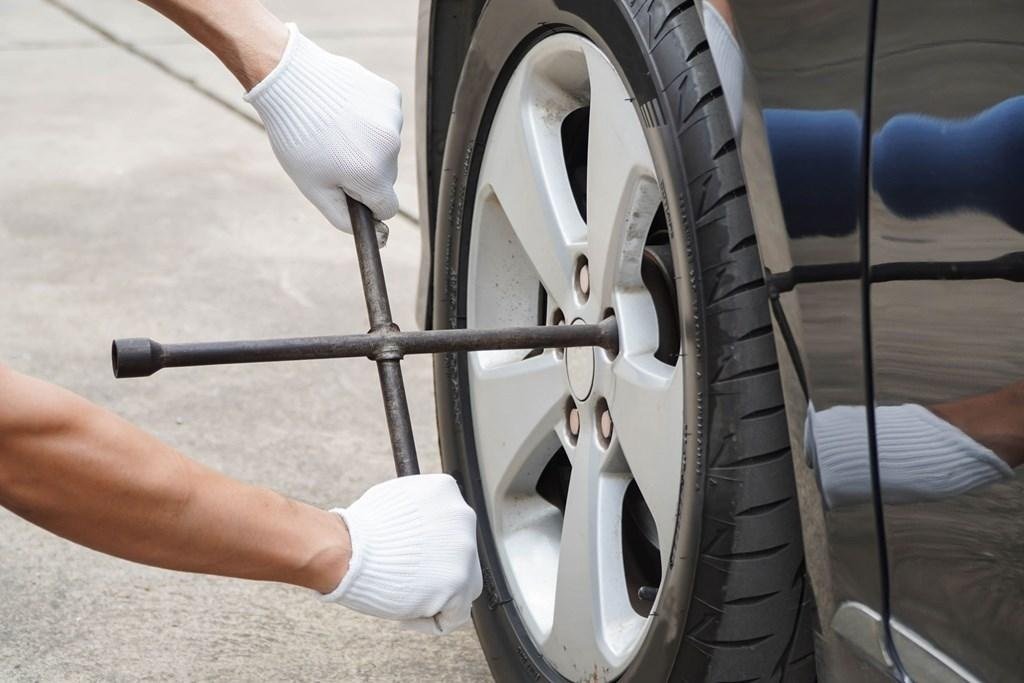
Before raising the vehicle, slightly loosen the lug nuts that hold the flat tire in place.
Fit the lug wrench securely over each nut and turn it counterclockwise when viewed from the outside of the wheel. Some nuts may be extremely tight, so use controlled pressure rather than sudden, forceful movements.
Loosen each nut approximately a quarter to half a turn. Do not remove them completely yet.
This step is easier while the tire is still touching the ground because the wheel cannot spin freely. If a nut will not loosen, avoid unsafe tricks such as jumping on the wrench or using an unstable extension. Consult roadside assistance if necessary.
Step 4: Lift the Vehicle With the Jack
Position the jack at the specific lifting point identified in your owner’s manual. Make sure the jack stands on firm, level ground and is correctly aligned before lifting.
Raise the vehicle slowly until the flat tire is just clear of the ground. You generally need only enough clearance to remove the wheel and fit the spare.
Keep your hands, feet, and other body parts away from the space beneath the vehicle. Do not place any part of your body under the car while it is supported by a jack.
If the jack begins to tilt, the ground shifts, or the vehicle moves unexpectedly, stop immediately. Do not continue working until the situation has been made safe. A jack should never be placed on loose gravel, soft soil, or an uneven surface unless a suitable stable setup can be established according to the manufacturer’s instructions.
Step 5: Remove the Flat Tire
Once the wheel is off the ground, finish removing the loosened lug nuts. Keep them together somewhere they will not roll away or become covered in dirt.
Hold the tire with both hands and pull it straight toward you. Wheels can be heavier than expected, so maintain a stable stance and avoid twisting your back.
If the wheel is stuck against the hub because of corrosion, do not place yourself beneath the vehicle or strike the wheel in a way that could destabilize the car. If it cannot be removed safely, call for professional help.
Set the flat tire on its side in a safe location, away from traffic and out of your immediate working area.
Step 6: Install the Spare Tire
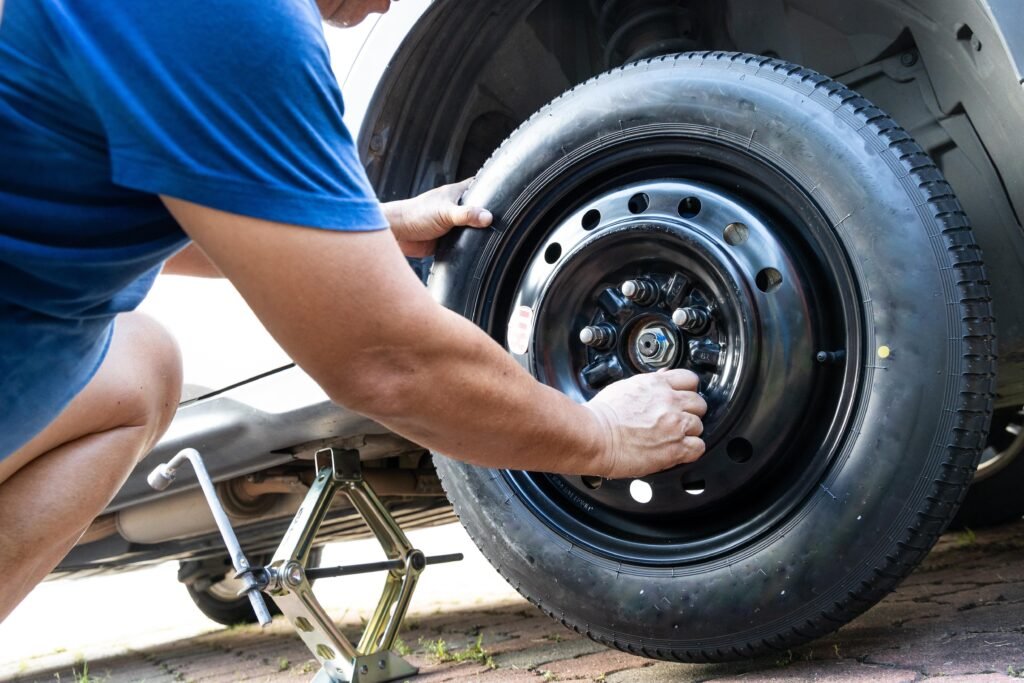
Lift the spare wheel and align its holes with the wheel studs or mounting points. Slide it onto the hub until it sits flat against the mounting surface.
Replace the lug nuts by hand, tightening each one enough to hold the wheel in position. This helps prevent cross-threading, which can damage the threads and make the wheel unsafe.
Tighten the nuts gradually in a crisscross or star pattern where applicable. For example, if there are five nuts, tighten one, then the nut opposite it, and continue across the wheel rather than moving in a circle. This helps the wheel sit evenly.
At this stage, make the nuts snug, but do not apply the final tightening force while the wheel is raised unless your vehicle’s instructions specifically require a different procedure.
Step 7: Lower the Vehicle and Tighten the Lug Nuts
Carefully lower the vehicle until the spare tire touches the ground and can no longer rotate freely. Remove the jack according to its instructions.
Use the lug wrench to tighten the lug nuts in the recommended star or crisscross sequence. The correct tightening torque depends on the vehicle, wheel, and fasteners, so consult the owner’s manual or a reliable vehicle-specific specification. A calibrated torque wrench is the best way to achieve the required setting.
Do not guess the torque or assume that maximum force is best. Over-tightening can damage wheel studs, while under-tightening can allow the wheel to loosen.
Once the wheel is secure, collect your tools and put the flat tire and equipment away safely.
Step 8: Check the Spare Tire Before Driving
Before setting off, confirm that all lug nuts are tightened to the manufacturer’s specification and that the spare is properly seated. Check the spare’s pressure if you have a gauge and can do so safely.
If you installed a temporary spare, read the label on the tire and the instructions in your owner’s manual. Temporary spares commonly have lower maximum speeds and restrictions on distance. These limits vary, so follow the exact instructions for your vehicle and spare rather than relying on a general rule.
Drive gently, avoid sudden acceleration or hard braking, and head to a tire shop as soon as practical to repair or replace the damaged tire. If the vehicle vibrates, pulls noticeably, makes unusual noises, or the wheel appears loose, stop somewhere safe and seek professional assistance.
A spare tire is usually a short-term solution, not a replacement for a properly repaired or full-size road tire.
Common Mistakes to Avoid When Changing a Tire
Even a straightforward tire change can become dangerous if important details are overlooked. Avoid these common mistakes:
- Changing a tire in an unsafe location: Moving traffic presents a greater danger than a flat tire. Call for help when necessary.
- Using the wrong jacking point: Incorrect placement can damage the car or cause it to fall.
- Removing lug nuts before loosening them: The wheel may spin while you try to turn the wrench.
- Crawling under a jacked-up vehicle: A jack alone is not a safe support for working beneath a car.
- Ignoring spare-tire limits: Temporary spares may have strict speed and distance restrictions.
- Skipping the torque check: Wheel nuts need the correct tightening force to help keep the wheel secure.
- Forgetting tire pressure: An underinflated spare may be unsafe even if it looks normal.
Taking a few extra minutes to check these details can help prevent damage and reduce the risk of an accident.
How to Prepare for a Flat Tire Emergency
The easiest time to prepare for a flat tire is before one happens. Check your vehicle’s owner’s manual so you know where the jack points are and how the spare tire is stored. Practise identifying the tools while the vehicle is parked safely at home, rather than learning everything beside a busy road.
Check tire pressure regularly, including the spare if your vehicle has one. Inspect the tires for worn tread, cracks, bulges, and other visible damage. Replace damaged tires promptly and keep a roadside assistance number available.
If your vehicle uses run-flat tires, an inflation kit, or a tire mobility system instead of a spare, learn the correct procedure for that system. Not every flat tire can be repaired with a sealant kit, and some damage requires professional replacement.
Most importantly, remember that you do not have to change a tire yourself. If the location is dangerous, the equipment is missing, or you are uncertain about any step, calling a trained roadside professional is a sensible decision.
Conclusion
Learning how to change a tire is a useful skill for every driver. By stopping in a safe location, securing the vehicle, loosening the lug nuts, using the correct jacking point, fitting the spare, and tightening the wheel properly, you can handle many ordinary flat-tire situations with greater confidence.
The key is to work carefully rather than quickly. Always follow your vehicle manufacturer’s instructions, respect the limitations of a temporary spare, and arrange for the damaged tire to be inspected or repaired as soon as possible. When conditions are unsafe or something does not seem right, prioritize your safety and call for professional help.
Frequently Asked Questions (FAQs)
1. How long does it take to change a tire?
For someone familiar with the process, changing a tire in a safe location may take around 15–30 minutes. Beginners may need longer, especially if the lug nuts are tight or the wheel is difficult to remove. Safety should always take priority over speed.
2. Can I change a tire without a jack?
A conventional wheel change generally requires a suitable jack to lift the vehicle safely. Do not try to lift a car manually or use unstable objects as substitutes. If you do not have the correct equipment, contact roadside assistance.
3. How tight should lug nuts be?
Lug nuts should be tightened to the torque specification provided by your vehicle manufacturer. The required value varies by vehicle and wheel type. Use a torque wrench when possible instead of guessing or tightening as hard as you can.
4. How far can I drive on a spare tire?
It depends on the type of spare. Temporary spare tires have specific speed and distance limits, while full-size spares may have different requirements. Check the tire’s label and your owner’s manual, and arrange to repair or replace the damaged tire promptly.
5. Should I replace a flat tire or repair it?
Some punctures in the tread area can be repaired professionally, depending on their size and the tire’s condition. Damage to the sidewall, large cuts, severe wear, or damage from driving on a flat tire may require replacement. A qualified tire technician can determine whether a repair is safe.
6. What should I do if my wheel will not come off?
First, make sure the vehicle is stable and you are working in a safe location. Corrosion can cause a wheel to stick to the hub. Avoid striking the wheel in a way that could destabilize the vehicle or putting yourself beneath a car supported only by a jack. If the wheel will not come off safely, contact roadside assistance.
7. Can I change a tire on the side of a highway?
Only consider it if you can reach a genuinely safe area away from moving traffic and the ground is suitable for the jack. A narrow shoulder or exposed roadside can be extremely dangerous. If the location is unsafe, stay clear of traffic and call roadside assistance or emergency services when appropriate.
